Java Style
Java is a language and languages come with a culture. One such cultural aspect is the way you format your code, like placing your brackets, parenthesis, spaces and curly braces. This coding style is intended to help you read the code, recognize the structure at a glance and find the interesting details easily and spot on.
The official Java style is derived from the Kernighan and Ritchie (K&R) style for the C programming language. Since syntactically Java inherits quite a lot from C, that would be logical choice.
The current and preferred way of using this java style is best described in the Google Java Style Guide.
Where have you put your Curly Braces.
Most holy wars are fought over the placement of the curlies '{}', and in some cases other brackets [] or parenthesis () and <> too.
In particular: Put them at the beginning of the line or at the end. The Java Style Guide is quite clear about that: Braces.
My personal motivation would be: If your understand that C and Java are block oriented languages, then you immediately will understand that placing a brace at the beginning of a line can only mean that you start a new block. This allows you to define a local scope. This is what you already know from for loops. Well the loop need not be there to allow yourselves to have some very local variables, like in the example below.
If you understand this block aspect of the K&R style, you know that you do not have to search for the name of a method, a class start or anything else. The block is just a block with local scope. It helps readability, because you can define your local variables at the place your need them and confine them there, without having the locals interfere with anything else in the method or class.
        {
            int i=0;
            // do something with i
        }
This often overlooked feature can help big time to help improve the readability of your code, in particular when the method is getting big. But since having big methods is a bit of a no go area in a modern programming style.[1], your rarely see it in practice.
In Java there is also another reason. You can have blocks at the class level, which allow you to define some kind of anonymous constructor. Remember Anonymous Inner Classes? Well, sometimes you want to have a constructor, just to initialise things. Here is an examples from the Java FX binding chapter.
    public static void main( String[] args ) {

        final DoubleProperty a = new SimpleDoubleProperty( 1 );
        final DoubleProperty b = new SimpleDoubleProperty( 2 );
        final DoubleProperty c = new SimpleDoubleProperty( 3 );
        final DoubleProperty d = new SimpleDoubleProperty( 4 );

        DoubleBinding db = new DoubleBinding() {

            { 1
                super.bind( a, b, c, d );
            } 2

            @Override
            protected double computeValue() {
                return ( a.get() * b.get() ) + ( c.get() * d.get() );
            }
        };

        System.out.println( db.get() );
        b.set( 3 );
        System.err.println( db.get() );
}- Start of anonymous block in line 10.
- End of anonymous block in line 12.
Javadoc style
See Javadoc style guide and How to write doc comments.
Not only does Java code have a proper style, the same applies to java-doc.
- Public means documented, as in proper javadoc.
- Everything that is marked public is part of the public API and must be documented.
protectedandpublicare alike here. They provide access to members from classes outside the package and must be documented.
- Because all [2] members in an interface default to public you need to document them too.
You can skip on documentation if * The member is not public or protected * For methods: it overwrites a method in a (documented) interface or super class.
Javadoc starts with /** and ends with */
Class javadoc
A (public|protected) class or interface needs javadoc at its class definition, just before class or interface.
A required tag is @author, and you are allowed to have that multiple times in a class, in particular if
multiple authors contributed substantially. See the the jdk libraries for examples.
 * <p>A {@code String} represents a string in the UTF-16 format
 * in which <em>supplementary characters</em> are represented by <em>surrogate
 * pairs</em> (see the section <a href="Character.html#unicode">Unicode
 * Character Representations</a> in the {@code Character} class for
 * more information).
 * Index values refer to {@code char} code units, so a supplementary
 * character uses two positions in a {@code String}.
 * <p>The {@code String} class provides methods for dealing with
 * Unicode code points (i.e., characters), in addition to those for
 * dealing with Unicode code units (i.e., {@code char} values).
 *
 * @author  Lee Boynton
 * @author  Arthur van Hoff
 * @author  Martin Buchholz
 * @author  Ulf Zibis
 * @see     java.lang.Object#toString()
 * @see     java.lang.StringBuffer
 * @see     java.lang.StringBuilder
 * @see     java.nio.charset.Charset
 * @since   JDK1.0
As a minimum for class javadoc, have one short sentence describing the purpose of the class. End that line with a period., followed by the author tag. It is considered bad style to leave out author or make substantial changes to a file without adding the author of those changes.
/**
 * Friendly and well known program.
 *
 * @author John Doe
 * @author Jane Doe
 */
 public class HelloWorld {
   public static void main(String... args){
     /// wot goes here should be obvious.
   }

 }
In particular in a project like PRJ2, you should have multiple authors if that best describes how a program came about.
Do Not skimp on Javadoc style. It is just as wrong as writing "Alice and Bob goes to town".
Adding your own code templates to NetBeans IDE
Productivity can be helped big time, if you add code templates to NetBeans. Quite a few are predefined but you can add your own too.
Go to Tools > Options > Editor > Code Templates. (for Mac, use NetBeans > Preferences instead of Tools > Options)
You get this dialog:
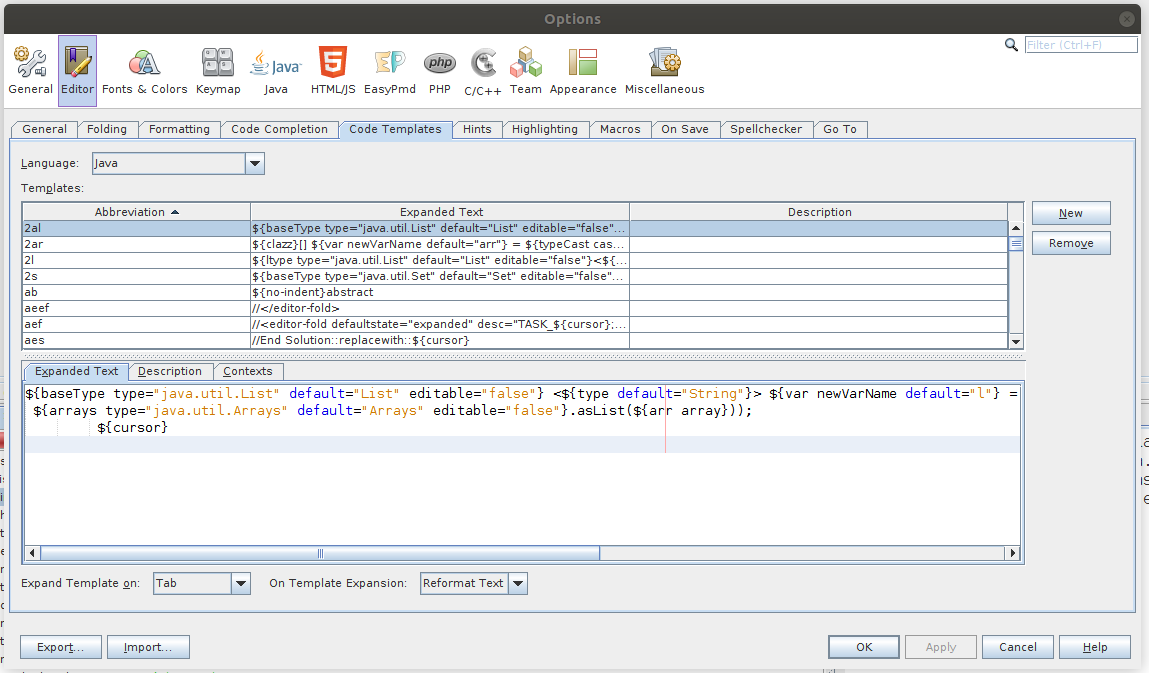
You can add one with the new button, Duh.
I find this one quite convenient:
//@Disabled("think TDD")
@${baseType type="org.junit.jupiter.api.Test" default="Test" editable="false"}
public void ${method}(){
    fail("method ${method} reached end. You know what to do.");
}- As of January 2020
jutmis junit 5 specific. - Note that
@Disabledis a tag that is only used when writing all test bodies beforehand. - Once you start writing the test, you should remove or comment (best) the
@Disabledto make the test effective.
Maven
From week two onwards we will use Maven as the preferred build tool. The link in the previous sentence points to the very readable complete reference manual, which also has some pointers for beginners, might you categorize yourselves as one.
Maven Repositories
A maven repository is a server that provides ready built maven 'artifacts', such as (binary) jar files containing libraries, frameworks or APIs and in many (but not all) companion jar files containing the javadoc (often) and sources of the same binary. A maven repository is NOT a source code management system (CMS),[3] although it typically holds several versions of a binary, and there are tools, such as Nexus Repository Manager.
There is a default repository, called maven central. You (as a team or company) can have your own repository.
If you look at a maven repository you will see that it is organized along the three axes: groupId, artifactId and version. We have published our Fontys Venlo informatics pom under groupId io.github.fontysvenlo, artifactId informaticspom and current (February 2024) 1.2.
Informatics pom
Spelled all lower case: informaticspom, is a super pom to use in Fontys Venlo projects. It keeps your own pom.xml file simple and focused to declare just the
dependencies needed. Niceties to do proper Test Driver Development are provided for in the informaticspom definitions, including things as being able to create
javadoc in a professional looking way, including code highlighted code snippets, checkstyle, reporting, code coverage with maven, pmd, spotbugs etc.
informaticspom is hosted on github.
This way of using maven, having a super or parent pom defined globally (in a repository, not on a local path), is the modern usage. It can be seen in well known big java projects such as Spring Boot and quarkus, to name two contenders in the java-web technology world.
    <parent>
      <groupId>io.github.fontysvenlo</groupId>
      <artifactId>informaticspom</artifactId>
      <version>1.2</version>
      <relativePath/> 1
</parent>- The parent pom does not live in a local directory near (relative to) the project, but instead in a repository. This makes a parent pom 'portable'. All of the starter projects we provide already use this parent in some version.
If you want to use informaticspom in your own project, copy the parent definition into your project’s pom file. Add additional dependencies as required.
Maven on Steroids or: use it properly
Sometimes you think, maven is not your thing because it is slowing you down, certainly if you are trying to work your way through your code TDD style: Write test, run test red, implement code, run test green, be happy.
But reconsider: Maven takes it’s job very serious, but since it is a computer program it is stubbornly stupid, so it might be that you are using it in the wrong way.
Let me explain what maven does:
- Maven uses build phases: initialize, compile, compile tests, run tests, package the application etc., when you build your application. It will check if all is in order, look if any updates are needed etc. This keeps maven busy and you waiting.
Packaging (which is what you do when you click build in the IDE) the application and
is only useful when your are really done: all tests are complete and the code turns them a nice green.
- So do not mvn build, but instead mvn test, then maven will do the minimum required.
So if you are in the habit of clicking build and then run your tests, you might want to change your habit.
Maven the proper way, when still in the TDD phase
As long as you are writing test and writing code, just do:
mvn test, or the equivalent in you IDE (click the test button, not the build button)
or mvn clean and then mvn test. (click clean, click test).
Only when you are done with all your tests, do
- clean (mvn clean)
- build (mvn package mvn -P fx package for fx projects)
and then run your application.
Then maven can do all of it’s serious work of assembling your application for deployment
Maven Modules
Many projects will have more than just one component (jar or war file). Think of the parallel project project 2.
It is a good idea to reflect this design in the way you structure your source code: use multiple modules.
Module
A Maven module is just a maven project, that has a pom.xml which defines the relation with other modules.

As you see in the figure, the parent lists its children. The children may have inter-dependencies. Otherwise it is just plain maven.
    <<parent>
      <groupId>io.github.fontysvenlo</groupId>
      <artifactId>informaticspom</artifactId>
      <version>1.2</version>
      <relativePath/>
    </parent>
    groupId>nl.fontys.sebivenlo</groupId>
    <artifactId>parentpom</artifactId>
    <version>1.0</version>
    <packaging>pom</packaging>
    <properties>
      <version>1.0</version>
    </properties>
    <modules>
        <module>entities</module>
        <module>db</module>
        <module>app-logic</module>
        <module>ui</module>
        <module>restserver</module>
    </modules>
As is usual between parents and children, there is an inheritance relationship. The children inherit setting and groupid, and version, if defined as a property. Note that thare is a a "grand"parent here too, the informaticspom, so you can apply all the good things you learned in PRC2 to your project as well.
Warning:
Do not declare dependencies of the children in the parent pom, because that introduces a cycle in the dependencies: parent depends on child, which depends on parent, which depend …. etc.
The parent pom can declare all external dependencies, that are shared between the children, such as the testing frameworks, any other external dependencies. The parent can declare its own parent, allowing it to inherit and pass on anything that inherits from such parent.
Putting things in modules has the following advantages:
- It promotes loose coupling.
- It can avoid the chicken and egg problem: In a normal build, it wants all tests to pass, to be able
to continue. For business code that is correct, but things like integration tests need a built war file, which cannot be built with failing tests.
Solution: Put the integration tests in a separate module of its own, which can be run at any time and will not slow you down or worse, disable testing or not having any tests.
Managing different Java versions
If needed, consider using a tool like sdkman to manage your java versions.